Chapter 2: Managing Your Campaigns within the Coupons App
Welcome to the Campaign Dashboard of Coupons, a powerful tool designed to streamline your marketing efforts through the creation, management, and distribution of coupon codes. Integrated with HubSpot's marketing automation workflows, this feature allows for seamless distribution of promotional codes to your contacts, enhancing customer engagement and sales opportunities.
Connecting Your HubSpot Account
Before leveraging the Campaign Dashboard, ensure your HubSpot account is successfully connected to Coupons. This connection enables the synchronization of data and the seamless operation of marketing workflows.
Steps to Connect:
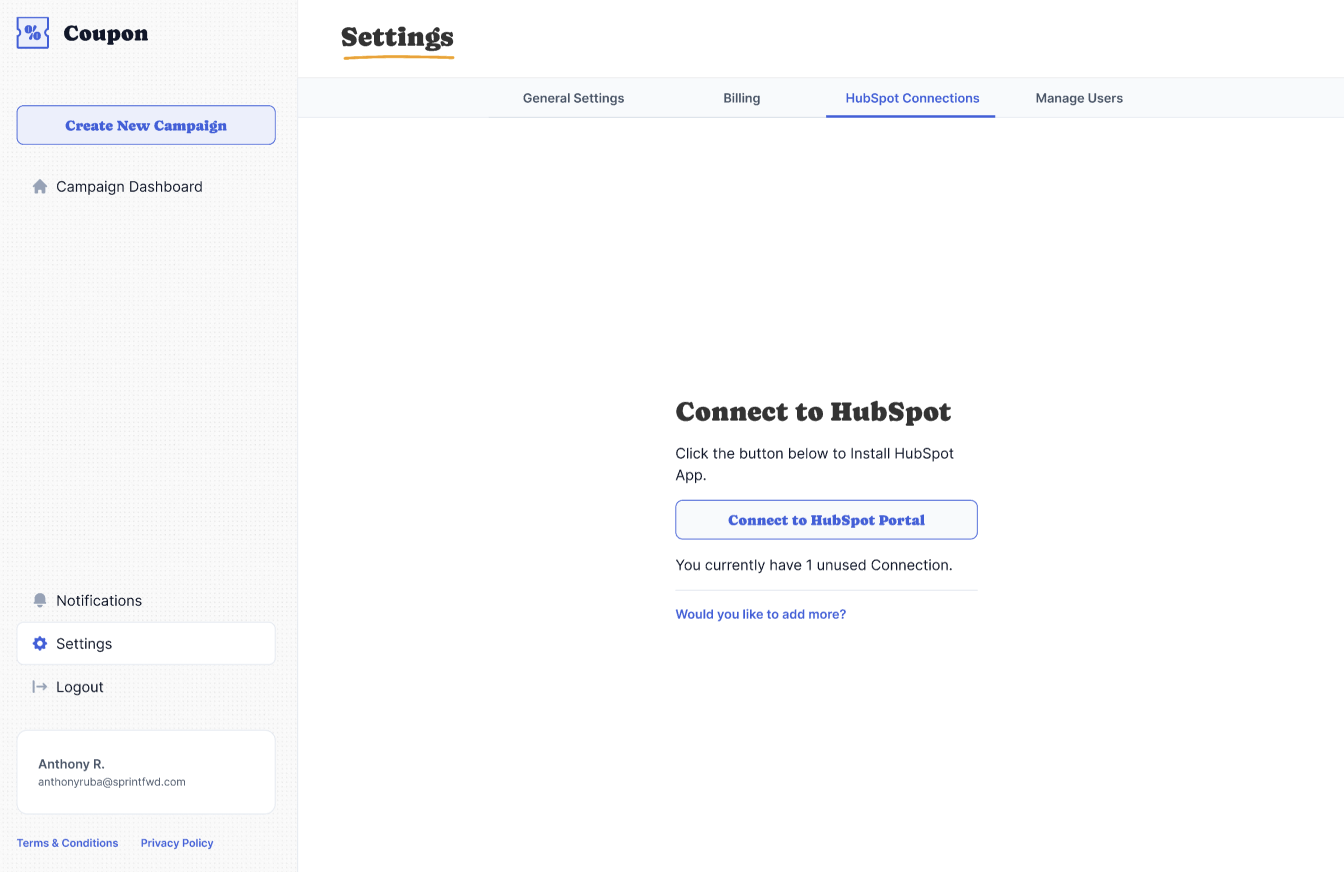
1. Access Settings: Navigate to the 'HubSpot Connections' tab within Settings.
2. Initiate Connection: If you have at least one available connection slot, click the "Connect to HubSpot" button. This action initiates the OAuth authorization process required by HubSpot.
3. Authorization Process: Follow the on-screen instructions to select the HubSpot Portal you wish to connect. This process involves logging into your HubSpot account and granting Coupons the necessary permissions.
4. Completion: After successful authorization, you'll be redirected back to Coupons, where the selected HubSpot Portal will now be connected and ready for use.

For a detailed walkthrough of connecting HubSpot Portals to Coupons check out our quick-start-guide.
Buying More Connections
The term "connections" refers to the number of HubSpot Portal connections you can connect to the Coupons app. The more connections you have, the more HubSpot Portals you can connect. To buy more connections in the Coupons app you have 2 options:
- You can click the Add Connections button in the HubSpot Connections tab in Settings as illustrated in the screenshot below
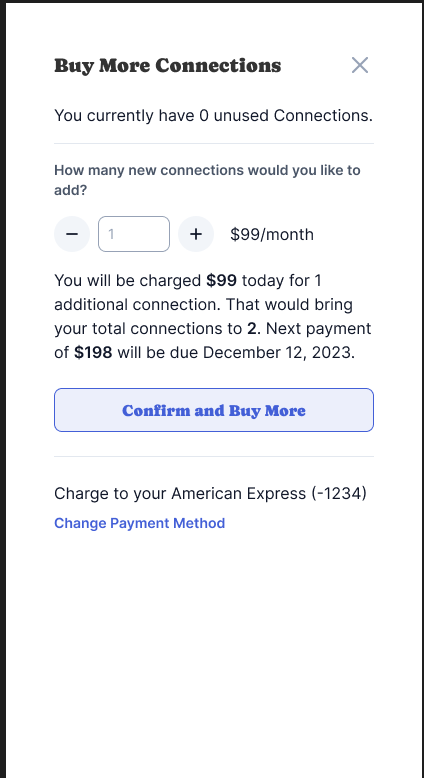
By Pressing the Buy More Connections option you will be presented with a Buy More Connections modal that will allow you to buy as many connections as you'd like. Select the amount and click the Confirm and Buy More button.
- You can also buy more connections through the Edit Payment Plan button in the Subscription Overview section in the Billing tab in Settings
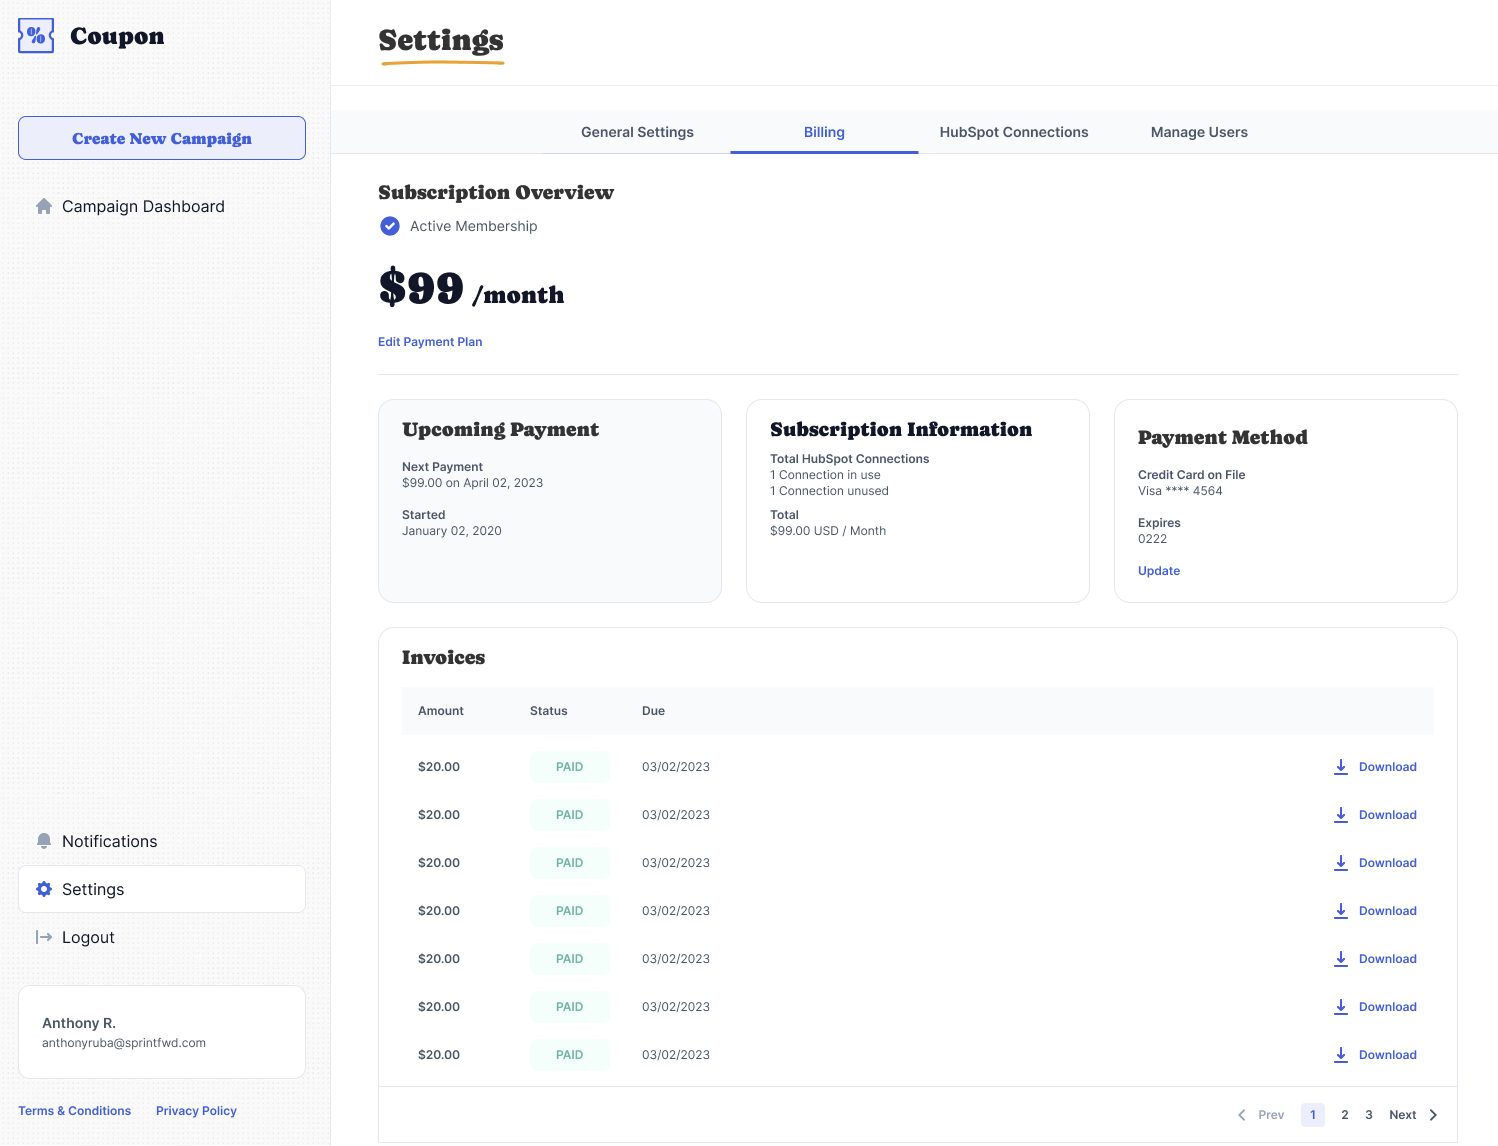
By Clicking the "Edit Payment Plan" button the Edit Payment Plan modal will appear allowing you to also specify how many connections you'd like to buy and prompting you to click the Confirm and Buy More button.

Creating a New Campaign
Within the Coupons app you are able to create targeted campaigns for distributing coupon codes. Each campaign can be customized to suit your marketing strategy.
Creating a Campaign:
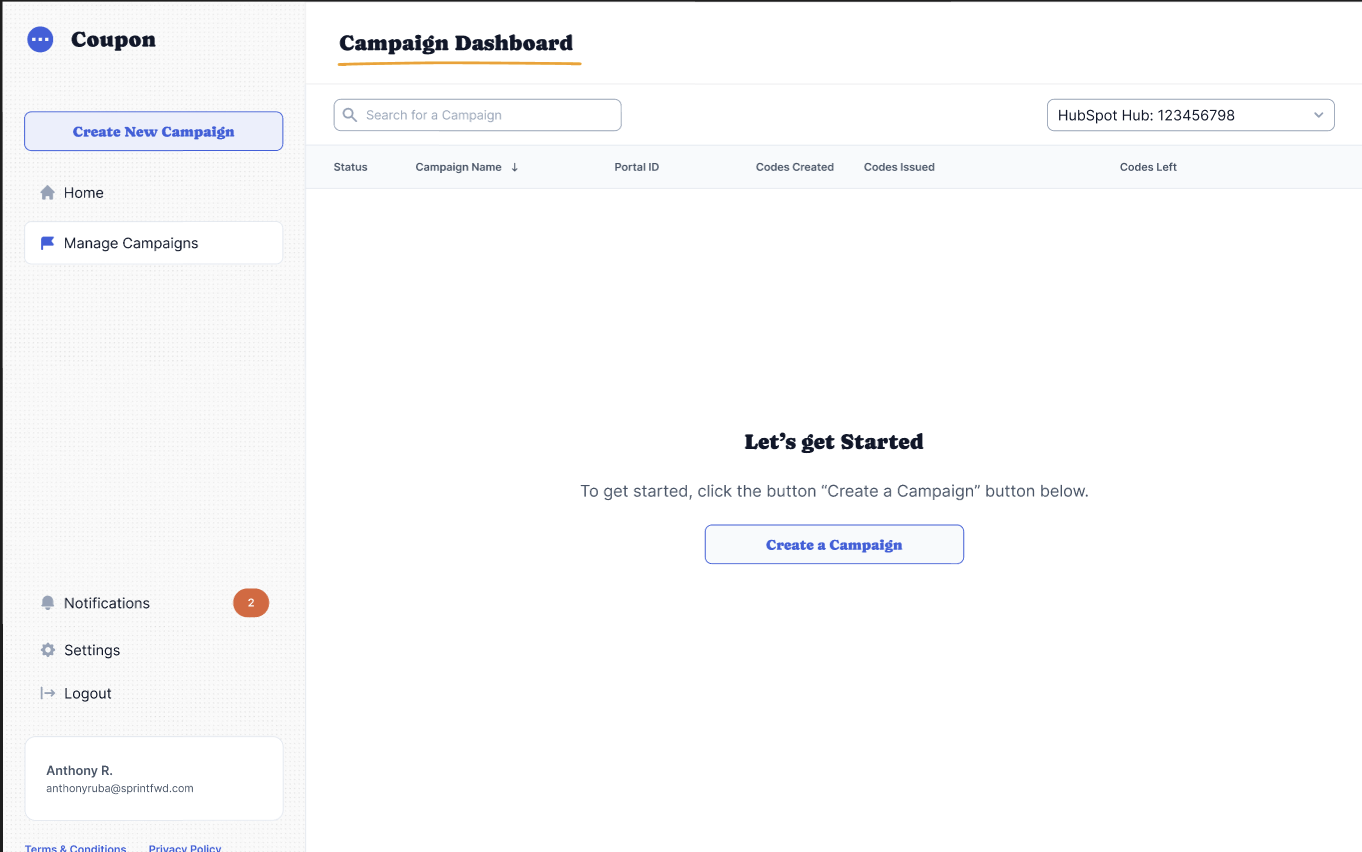
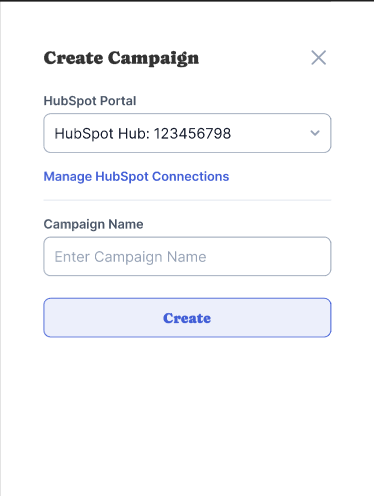
1. Start New Campaign: Click the "Create New Campaign" button on the Campaign Dashboard or left-sidebar.
2. Configure Campaign: The Create Campaign slider will appear and allow you to choose the HubSpot Portal you've connected and assign a unique name to your campaign for easy identification.
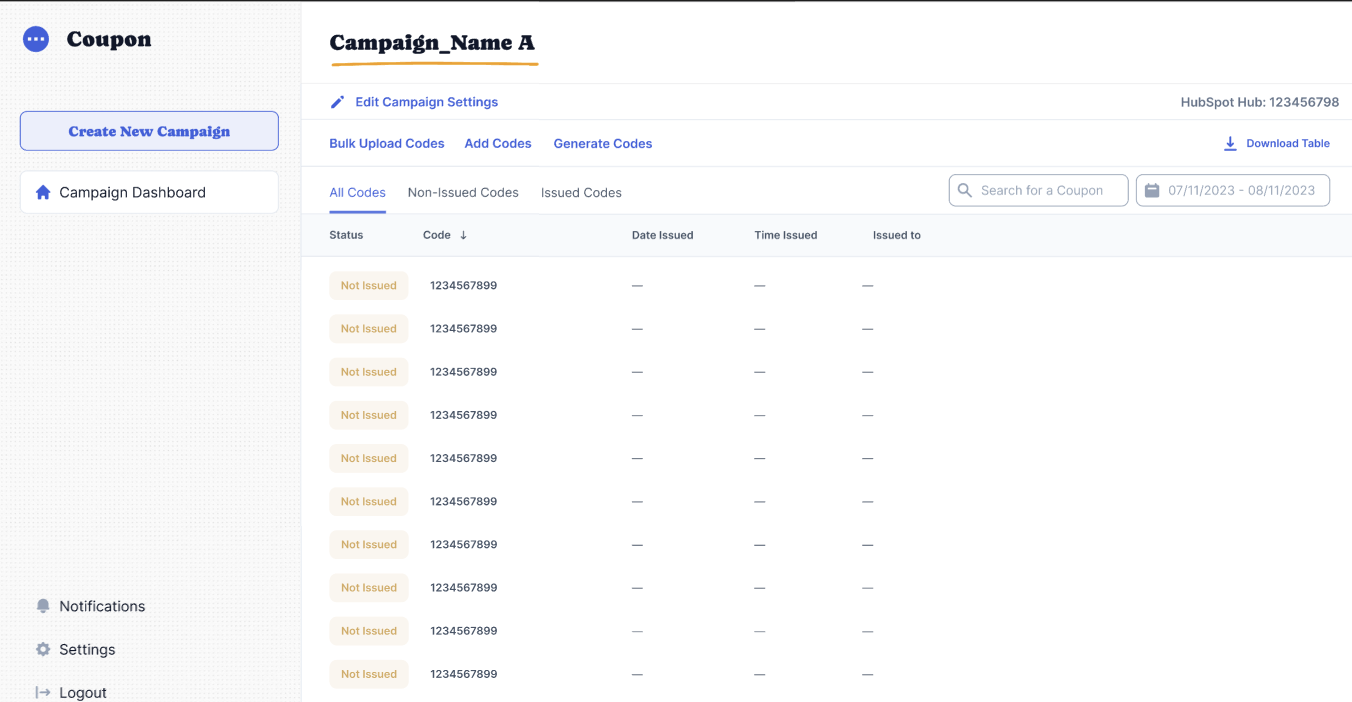
3. Adding Coupon Codes: After Creating Your Campaign, within the Campaign Detail View you'll have three methods to add coupon codes to your campaign:
- Bulk Upload: Utilize the provided template to bulk upload codes. Download the template, populate it with your codes, and upload it back into the system.
- Manual Creation: Directly input coupon codes into your campaign manually, allowing for quick additions or modifications.
- Automatic Generation: Specify the desired number of codes and their format, and the system will generate them for you, ensuring uniqueness and compliance with your criteria.

For a detailed walkthrough of creating your campaigns check out our Creating a Campaign quick-start-guide.
Campaign Dashboard
The Campaign Dashboard provides a comprehensive overview of your campaigns, including detailed analytics on code distribution and usage.

Viewing Campaign Details
- Dashboard Overview: Access an at-a-glance view of all campaigns, including the total number of codes and their distribution status.
- Detailed Insights: Click on "View Campaign" for any campaign to access detailed information about each code, such as its status (Issued or Not Issued), the actual code, creation date and time, and recipient details.
Integrating Campaign Codes into HubSpot Workflows
To maximize the impact of your coupon codes, integrate them into your HubSpot marketing workflows, enabling automated distribution to your contacts.
Integration Steps:
1. Workflow Creation: In HubSpot, go to the 'Automations' tab within the Marketing Hub and either create a new workflow or edit an existing one.
2. Add Request a Coupon Code Step: Insert a new step named "Request a Coupon Code" in your workflow. This step will automatically pull a coupon code from your campaign and assign it to the designated contact.
3. Configure Distribution: Set up the criteria for distributing the codes, such as triggering events or contact characteristics, to ensure the right audiences receive your promotions.
For a detailed walkthrough of integrating your coupon codes into your HubSpot marketing workflows, check out our Adding the Request a Coupon Code step within your HubSpot Workflow quick-start-guide.
Best Practices
- Regular Monitoring: Frequently review your campaign performance and adjust strategies as needed based on code redemption rates and customer engagement.
- Active HubSpot Integration: Ensure your HubSpot connection remains active and troubleshoot any connectivity issues promptly to maintain seamless workflow operations.
FAQ
https://dashapps.helpscoutdocs.com/article/242-coupons-app-faq
Contact Support
Should you require any further assistance or have questions not covered in this document, please reach out to our support team at support@dashapps.com, where our dedicated staff is ready to assist you.